Wood veneer acoustic panels are a stylish and effective way to improve sound quality in any room. Whether you're upgrading your home studio, office, or living space, installing acoustic panels yourself is easier than you might think.
In this guide, we’ll walk you through how to install wood veneer acoustic panels using glue, drywall screws, or Rawl plugs for hard walls. We’ll also show you how to cut out sections for plug sockets using a jigsaw, ensuring a clean and professional finish.
What You’ll Need
Before you begin, gather the following tools and materials:
-
Wood veneer acoustic panels
-
Construction adhesive (for glue method)
-
Drywall screws or masonry screws with rawl plugs
-
Drill and masonry drill bits
-
Screwdriver or impact driver
-
Jigsaw (for socket cut-outs)
-
Spirit level and measuring tape
-
Pencil or chalk
-
Safety goggles and gloves
1. Planning Your Layout
Start by planning where each panel will go. Mark your wall with light pencil lines or a chalk line for perfect alignment. For the best acoustic performance and aesthetics, stagger the joints and maintain consistent spacing if needed.
2. Installation Methods
Method 1: Glue (Adhesive) Installation – Best for Smooth, Dry Walls
Step-by-step:
-
Clean the wall surface to remove dust and grease.
-
Apply a strong construction adhesive to the back of the panel in a zigzag or dot pattern.
-
Press the panel firmly against the wall.
-
Hold it in place for 30–60 seconds.
-
Use painter’s tape to secure it temporarily until the adhesive sets.
Note: Only use glue on surfaces that are flat, dry, and in good condition. Avoid this method on uneven or dusty walls.
Method 2: Drywall Screw Installation – Ideal for Plasterboard Walls
Step-by-step:
-
Use a stud finder to locate studs behind the drywall.
-
Align your panel and drill small pilot holes through the slats.
-
Use drywall screws to fix the panel into the studs or directly into drywall if the panels are lightweight.
-
Countersink the screw heads and optionally cover them with wood filler or acoustic slats for a seamless look.
Tip: Drywall screws are easy to install and remove, making this method perfect for renters or those wanting flexibility.
Method 3: Rawl Plugs for Hard Walls – Best for Brick, Concrete or Stone
Step-by-step:
-
Mark your drill points on the wall through the panel.
-
Remove the panel and drill holes using a masonry bit.
-
Insert rawl plugs into each hole.
-
Place the panel back and drive in masonry screws or hardened steel screws through the slats into the rawl plugs.
This method provides a strong and secure fix on hard walls, but does require a bit more prep time.
3. Cutting Out Plug Sockets – Clean and Simple with a Jigsaw
If a panel overlaps with a plug socket or light switch, you’ll need to cut a precise opening. Here’s how:
-
Measure the exact position and size of the socket on the wall.
-
Transfer those measurements to the back of the panel.
-
Drill a pilot hole in one corner of the outline.
-
Use a jigsaw to cut out the socket shape.
-
Test the fit before installing the panel.
Take your time with this step – a clean cut ensures a professional finish around plug sockets.
Final Tips for a Perfect Install
-
Use a spirit level throughout the installation to keep panels straight.
-
Wear protective goggles when cutting panels or drilling.
-
For large areas, work in small sections and double-check alignment as you g
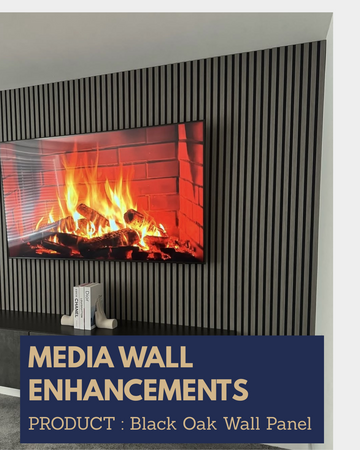
Imagine experiencing cinema-quality sound while enjoying your favourite concert at home. Or having a clear conversation without needing to repeat the last sentence over and over. That’s the power of acoustic panels – designed not only to elevate your home’s aesthetic but also to significantly improve its sound environment. They enhance everyday comfort by reducing reverberation and external noise, while complementing modern interior design.
If you’re considering soundproofing your walls, read on to discover why acoustic panels are a practical and elegant solution.
Understanding Reverberation: Why Do Some Rooms Sound So Harsh?
Have you noticed echoes in your living room or found it hard to hear the television clearly during a family gathering? That’s likely due to reverberation – the reflection of sound waves off hard surfaces such as walls, ceilings, and floors.
When sound bounces around a room before it reaches our ears, it overlaps and lingers. If this reverberation exceeds 100 milliseconds, we perceive it as an echo, making conversations muddled and sound quality unpleasant.
This effect is more common in:
-
Open-plan living areas
-
Minimalist interiors with few soft furnishings
-
Large, high-ceilinged rooms
Improving your home’s acoustics means addressing this reverberation, which can also be exacerbated by noise from other rooms or external sources like neighbours and traffic.
How Acoustic Panels Improve Room Acoustics
If your home suffers from both reverberation and external noise infiltration, acoustic panels can address both issues effectively.
The key lies in their structure. Acoustic panels feature a three-dimensional surface that disrupts and absorbs sound waves. For optimal performance, opt for panels mounted on 8mm acoustic felt. These panels are also available in sculpted or 3D versions for extra aesthetic impact and acoustic performance.